
The Ultimate Guide to 4-Bar, 6-Bar, and 8-Bar Lifts in VEX IQ
Wednesday, November 18, 2026
In VEX IQ we often need to lift an object well above the initial 15-inch starting limit. There are several different kinds of arms you can use to do this.
The simplest type is a 4-bar arm, which allows you to pick up an object, keep it in the same orientation, and score it on a goal.
Reaching higher
In many cases you want to reach a lot higher than a simple 4-bar.
While you can simply make the 4-bar longer, this sometimes has the unintended effect of making it much more flimsy. I've spent many hours trying to make my 4-bars more rigid while also increasing their height.
It's achievable, but if you're going for a very tall arm, it's usually worth looking at 6-bars and 8-bars.
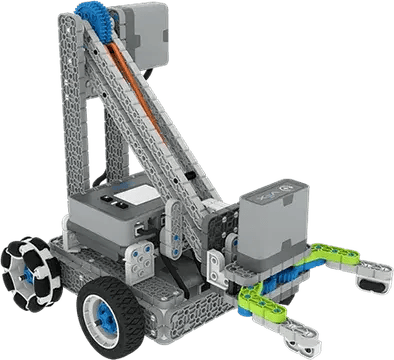
Unfortunately a 6-bar or 8-bar doesn't give you more height magically. It takes it away from the bottom. The lowest your arm can reach is reduced and the highest your arm can reach is increased.
It's effectively like mounting the claw several inches above the end of your 4-bar.
Here's a robot that, instead of using an 8-bar, mounted the claw 3 inches above the end of the 4-bar.
4-bar geometry
The secret to building an effective 6-bar or 8-bar is correct spacing.
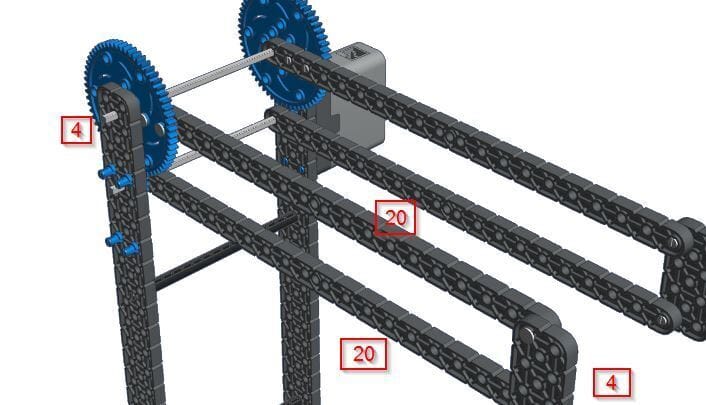
Let's take a 4-bar as an example. On a 4-bar the top and bottom beams must be the same length and the front and back beams must also be the same length.
In this example we use 20 and 4, but you can use whatever length you need for the arm.
6-bar geometry
When you are building a 6-bar or 8-bar, the principle is the same. You just have more numbers to keep track of.
Rather than just having two numbers that need to match, you now have four.
You change the value of a, b, c, and d but they each have to match across top-bottom or front-back.
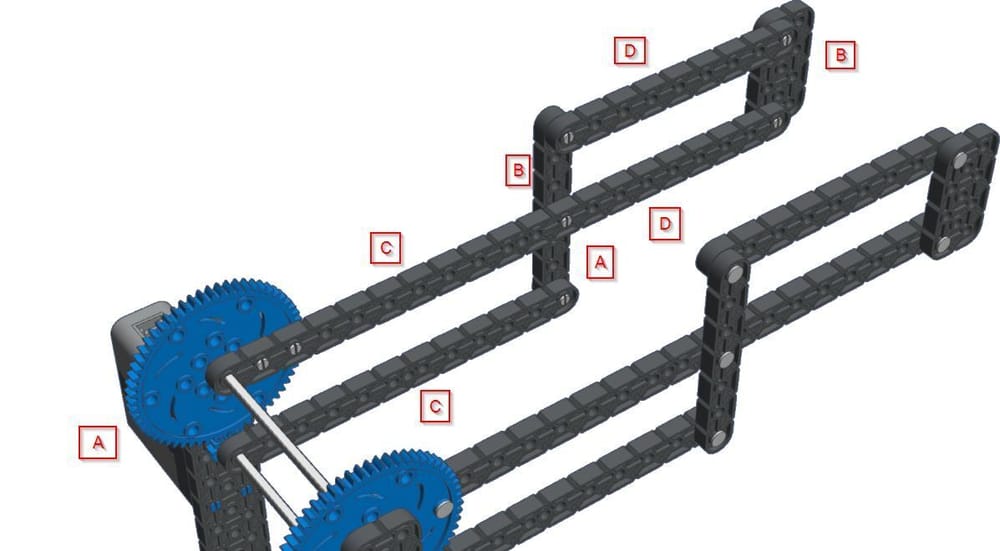
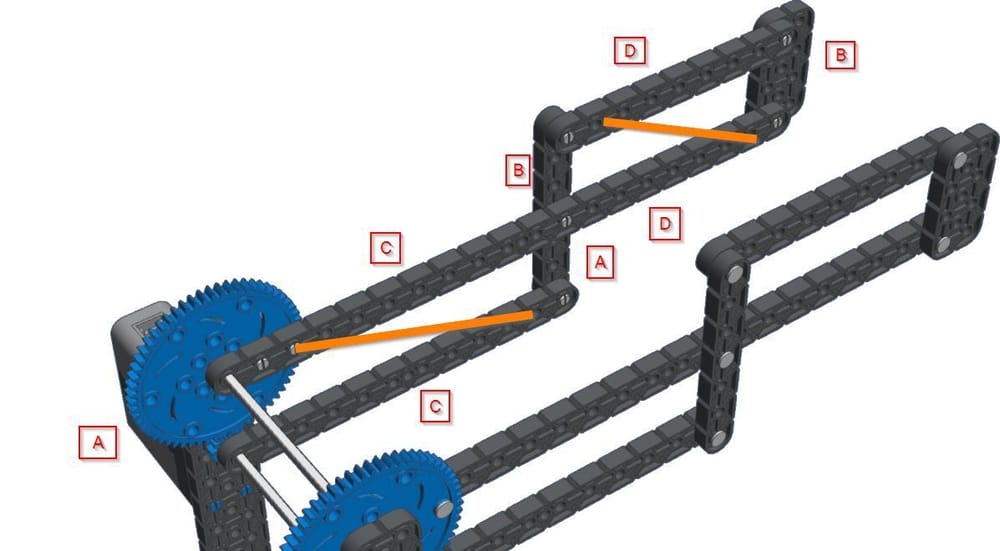
Once you've got the geometry of your 4-bar, 6-bar, or 8-bar working, the next step is to power it.
In general you will need to use gears to slow down the motor. This will provide you with more torque and allow you to lift up the arm more effectively. As you can see in the image above, we used a 5:1 gear ratio, which allowed the arm to be lifted with five times the power of a motor.
Without this additional gearing the arm would have moved too fast to be useful and would not have been able to carry any load. Adding a claw would have made the arm too heavy to lift up.
If you do end up putting an especially heavy claw on, you will still sometimes have issues lifting it. While you can add a more aggressive gear ratio, it's usually easier to counterbalance using rubber bands.
Rubber bands can be placed diagonally across the 4-bar in order to assist with lifting. Here is a sample placement of rubber bands, though you can move your rubber band placement based on how much assistance your arm needs.
In the diagram rubber bands are only placed on one side of the arm. However you'd want to make sure placement is symmetrical. The reason placement is not symmetrical in the image is to make it so it's easier to read and understand.
Using this in real life
The easiest way to fully understand how these mechanisms work is to build one.
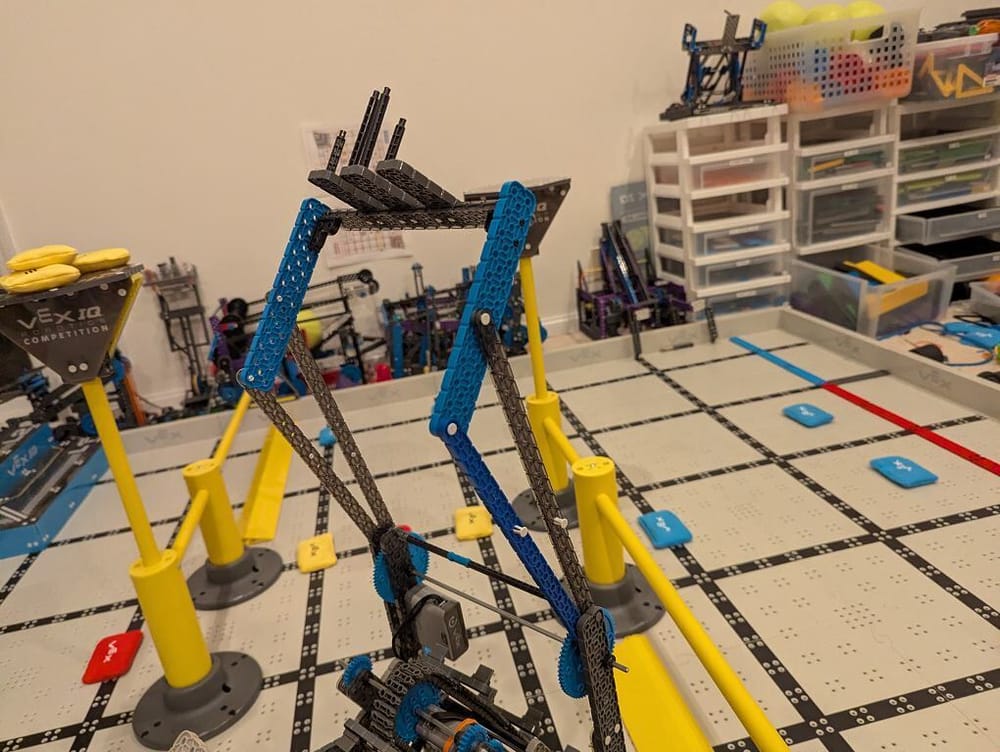
HIGHRISE is a simple robot that uses a 6-bar to reach level 4 in VEX IQ Level Up.

Ben Lipper
Teacher, Robot designer, and always an engineer at heart
I've been in competitive robotics since 2015.
Today I work with robotics coaches to get their teams unstuck so they can build world-class robots while the kids have a total blast doing it
Build robots the easy way!
In this course, I show you the detailed process that I used to design and build each robot on my channel
Not ready to sign up?
Learn more